Here is a look of some that are on display in the main hallway! They sure are getting a lot of attention from the teachers here at BES.... everyone thinks they are so creative!
Monday, October 15, 2012
Second Grade Giuseppi Arcimboldo Inspired Self-Portraits
Second graders just finished a self-portrait collage lesson where we discovered the artist Giuseppi Arcimboldo. Arcimboldo was known for his painted portraits of people made up of objects such as books, flowers, vegetables, and other plants. We began our exploration of the artist through playing a game with the Smart board where the students could practice the concept of collaging a human portrait using various vegetables. Then, the students were on their way cutting images from family and garden magazines to use in their portrait collage. They turned out to be so unique! It was a funny lesson that had us all giggling all throughout art class!
Fourth Grade Takes A Turn With Gelatin Prints!
Our big idea for the month of October is Environment. For fourth grade, we are learning how our environment can inspire our art as well as be used to create our art. We had a fabulous time making prints using the gelatin printmaking method. The students loved it so much that they wanted to know how they could do it at home! So here is what you need: A box of Knox unflavored gelatin (you can get it from any grocery store), a baking pan to hold the gelatin, water based printing ink (you can get from Hobby Lobby or any craft store), a brayer to roll the ink (any craft store), aluminum foil to roll the ink out, and lots of soft foliage like leaves to use in the printing process.
Step 2: roll out your ink first on the foil and then roll ink onto the gelatin until the ink on the gelatin is opaque.
Step 4: Place paper over the leaves and gently rub the back of the paper. You are trying to pick up all of the ink around the leaves to create your negative print. Pull your negative print.
Step 7: Do steps 1-6 again and again!! Have fun!
Step 1: Prep your gelatine printing plate by placing 2 cups of water in a pot and 4 packets of gelatin powder (4 tbsp). Heat water up to dissolve the gelatin and stir consistantly so it doesnt burn to the bottom! Once the water is hot, pour it into your baking pan and place in the frige to harden for at least 12 hours.
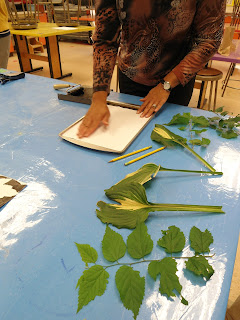
Step 3: Lay your leaves onto the inked gelatin plate. Yarn works great too!
Step 5: Blot any extra ink not picked up from the negative print and then carefully peel away the leaves from the gelatin.
Step 6: Lay a second peice of paper down on the gelatin to create your positive print.
Step 7: Do steps 1-6 again and again!! Have fun!
Here are some that are now on display in the main hallway! They look so beautiful and it was such a fun way to teach negative and positive space to fourth grade! I hope that you have fun doing these at home :)
Wednesday, October 10, 2012
Teachers Make Art, Too!!!
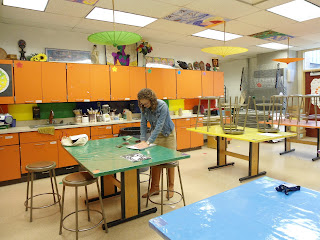
Yes... it's TRUE! I love having the teachers come in some afternoons to decompress and have fun with art! The day doesn't always end for us when the students leave so it is important for us to take some time to sharpen the saw through getting creative. Fourth grade will be doing a lesson on positive and negative space by creating gelatin prints using elements of nature (leaves, flowers, vines, etc.). So I invited the teachers to come try out the process after school yesterday. Here is what we did! :)


I am so excited to do these with fourth grade this Thursday and Friday!
Monday, October 1, 2012
Fourth Grade Wire Self-Portraits
Fourth grade just completed their first art piece of the year... how exciting! We started off the unit discussing the artist Alexander Calder and his wire portraits. We then discussed the idea of a continuous contour drawing, a line drawing where the drawing tool is never lifted from the paper, and how the wire portraits use continuous contour lines. We practiced creating continuous contour line drawings of our self-portraits using the paint program on the smart board! So FUN!
Next, the students began using the wire medium to start their abstract self-portraits.
This project was so fun! Using wire as an art medium was unique to the students and myself and it could not have gone any better! Come check out the display of some of the wire portraits in the art display case at school.
Subscribe to:
Comments (Atom)


